

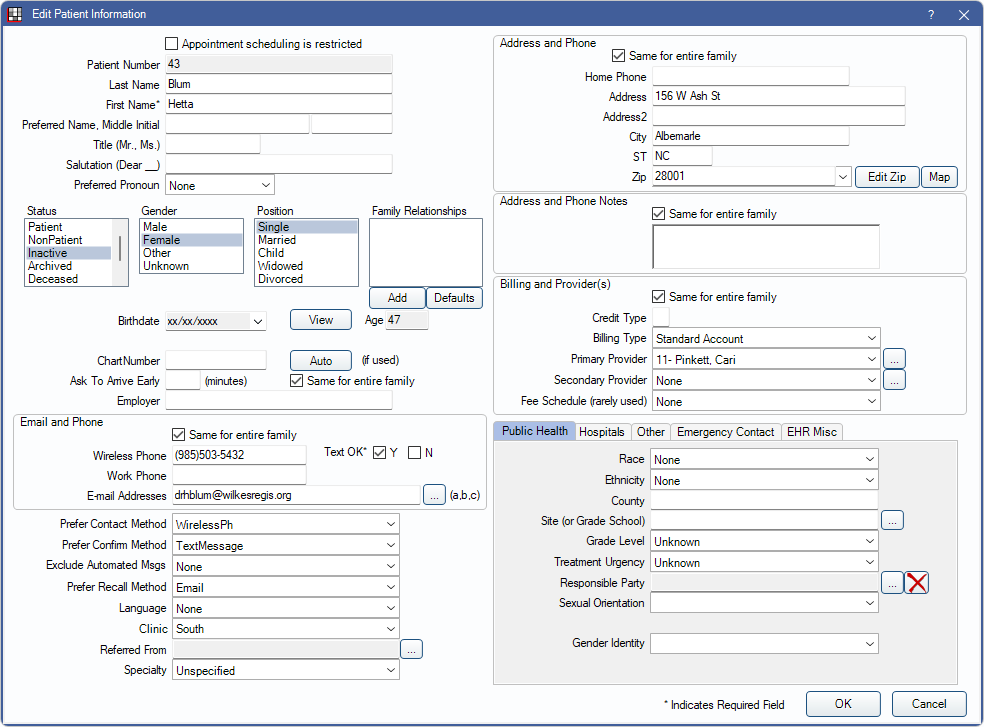
Edit Patient Information
Add and edit patient demographic and contact information from the Edit Patient Information window.
In the Family Module, double-click in the Patient Info area.
Alternatively:
- In the Chart Module, double-click in the Patient Info area.
- In the Select Patient window, click Add Pt to create a new patient account.
- In the Family Module, click Add to create new family member.
Patient Name
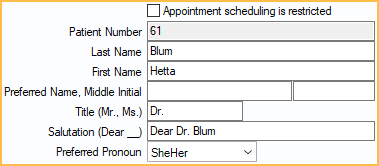
- Appointment scheduling is restricted: If checked, appointments cannot be scheduled for the selected patient. This includes scheduling new appointments, sending existing or planned appointments to the pinboard, moving an appointment to another time slot, scheduling via Web Sched Recall, Web Sched Existing Patient, or scheduling an appointment from the unscheduled list. If unchecked, appointment scheduling is not restricted.
- To create automation that automatically checks/unchecks this box based on billing type, see Automation.
- In Display Fields, add Pat Restrictions to the Patient Information grid to view scheduling restrictions associated to the selected patient.
- Requires the Patient Restriction Edit permission.
- Patient Number: Assigned automatically by the system and shown for reference. Numbers are assigned sequentially. The patient number is not equivalent to the count of patients in the database. Gaps can occur when a database split is performed or when patients are deleted. To find a patient count, use a query instead.
- Last Name, First Name: Patient formal last and first name.
- Preferred Name, Middle Initial: Enter the patient's preferred name (e.g., Sam instead of Samuel). For easy reference, the Preferred Name will show before the first name in most areas of Open Dental. Enter a middle initial if needed.
- Title: Insert a title the patient may go by (e.g., Dr.).
- Salutation: Useful for sheets (e.g., Dear Dr. Smith).
- Preferred Pronoun: Select a preferred pronoun to override the pronouns used for sheets. When set to None, the default pronouns for the patient's selected gender will be used. Only displays when Show Preferred Pronouns for Patients is enabled in Preferences.
Status, Gender, Position, and Relationships
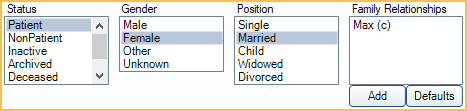
- Status: The patient's current status. Use the Patient Status Setter tool to edit the status of multiple patients at once.
- Patient: This is the default. Use for patients who are active.
- NonPatient: Someone who is not a patient but needs to be entered in Open Dental (e.g., the parent of a child, a guarantor, or an insurance subscriber).
- Inactive: Patient who is no longer active.
- Archived: Patient who is not coming back. To edit archived patient information, the logged on user must have the Archived Patient Edit permission.
- Deceased: A deceased patient.
- Consider zeroing out the account at the same time if the office does not wish to collect amounts due.
- To lock the patient's age as of the deceased date, see Edit Patient Information: EHR Misc Tab.
- If a patient has upcoming appointments scheduled, and they are marked as deceased, users will get a prompt to remove future appointments.
- Prospective: Someone who has never been in before, but might become a patient. This status can be automated in Operatories.
- Deleted: A hidden status that the user will never see. The patient will no longer show anywhere in the program and the integrity of the database is maintained.
- Gender: The biological sex of the patient. Unknown is for HIPAA compliance in case a patient does not wish for the office to record or track their gender. To record gender identity or sexual orientation, see Edit Patient Information: Public Health Tab. Other will be converted to Unknown when creating printed claims, sending electronic claims, or sending prescriptions in DoseSpot.
- Position: Marital status of the patient.
- Family Relationships: Indicates this patient's family relationship (e.g. guardian, spouse, father, mother) to other patients. See Family Relationships.
Note: When changing status to anything other than Patient , Recall will be automatically disabled. If the status is changed back to Patient, recall will be automatically re-enabled.
Miscellaneous Information
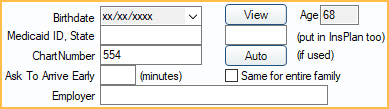
- Birthdate/Age: The patient's birth date. Age is calculated automatically based on the birthdate.
- Birth dates entered on select patient window automatically carry over when adding a new patient.
- When the Preference Mask patient date of birth is enabled, the birthdate will be masked (e.g., xx/xx/xxxx). A View button will appear.
- Users with the Patient Birthdate View permission can click View to unmask the birthdate.
- Two digit years are converted to four digit years by the computer's Windows Settings, which can be changed.
- Users will need to click out of the Birthdate field upon first entering (or changing) the birthdate before age will calculate.
- Medicaid ID, State: This field is only visible when Medicaid is turned on in Show Features. If entered here, also enter the number in the insurance plan as the Subscriber ID. Enter the two-letter State Abbreviations for the Medicaid State. Entering the first letter of the abbreviation will prompt a dropdown of choices beginning with that letter.
- Chart Number: Optional, but not recommended. Useful when users need a place to enter patient ID numbers if the database was converted from another program, or if offices want numbers on their paper charts. Click Auto to assign the next available numeric chart number to the patient. It will not work for mixed letters and numbers. The only place the chart number will show is in the Family module.
- Ask to Arrive Early: If a value (in minutes) is entered, a reminder message, with requested arrival time, will appear each time an Appointment is made for this patient. See Time Ask to Arrive for more information.
- If Same for entire family is checked, when this is changed for one family member, it is updated for all family members. When adding a new family member this is always unchecked by default.
- Employer: Enter the patient's employer. When entered, the employer is automatically inserted into new insurance plans for the patient.
Email and Phone
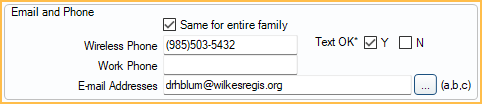
- Same for entire family: If checked, when information in this area is changed for one family member, it is updated for all family members. This does not apply to the Text OK status.
- Wireless: The patient's wireless phone number. Phone numbers automatically format when typing.
- Text OK: Indicate if patient can receive text messages.
- Yes: Patients can receive text messages.
- No: Patient cannot receive text messages.
- No Selection: If the preference, Text Msg OK, assume default is 'No' for patients with no selection is enabled, this is treated as No. If the preference is disabled, this is treated as Yes.
- When changing a patient's Text OK setting, users will receive the following prompt:
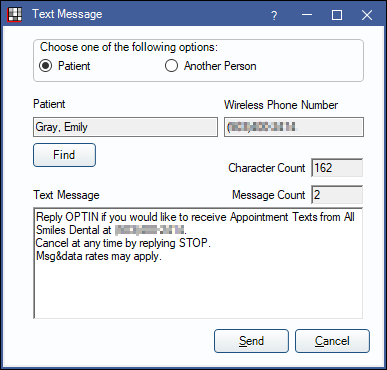
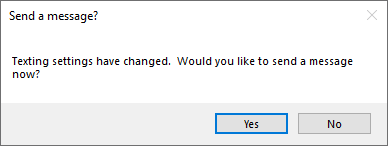 Click Yes to generate the following message to send to the patient to prompt them to opt in to Appointment Texts.
- Work Phone: The patient's work phone number. Phone numbers automatically format as you type.
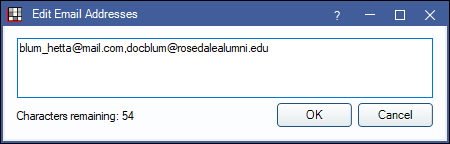
- Email Addresses: Enter the patient's email address. Add multiple email addresses by separating them with a comma.
- Email addresses must be valid (e.g., name@email.com) for emails to send. Invalid email addresses will be skipped.
- Click [...] to see the full email address. There is a 100 character limit.
Contact Information
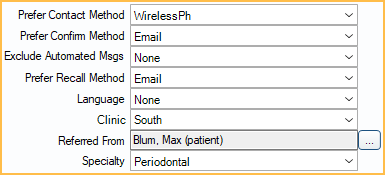
- Prefer Contact Method: Preferred general contact method. This option will show in bold in the Family Module, Patient Information area.
- Prefer Confirm Method: Preferred method when confirming appointments. The selected information will list for the patient in the Contact column of the Confirmation List.
- Prefer Recall Method: Preferred method when scheduling recall appointments. This selected information will list for the patient in the Contact column of the Recall List.Note: There are multiple options for each preferred method:
- None: No preferred method has been set.
- DoNotCall: DoNotCall will show.
- HmPhone: Lists the patient's Home Phone number.
- WkPhone: Lists the patient's Work Phone number.
- Wireless: Lists the patient's Wireless Phone number, preceded by Cell (typically used for calling a wireless number).
- Email: Lists patient's email address.
- SeeNotes: SeeNotes will show.
- Mail: Mail will show.
- TextMessage: Lists the patient's wireless phone number, preceded by text (used for text messaging which is available from the Confirmation List).
The preferred method can affect defaults in other areas including:
- When emailing Web Sched Recall reminders (manual and automated).
- When emailing recall reminders or printing recall postcards from the Recall List (text messages can only be sent individually, not via the Recall List).
- When emailing or texting confirmation reminders or printing confirmation postcards from the Confirmation List.
- When sending automated appointment reminders about scheduled appointments. See eReminders.
- Exclude Automated Msgs: Exclude this patient from receiving text or email automated messages. Automated messages include: eReminders, eConfirmations, Automated Thank-Yous, WebSched Recall, WebSched ASAP, WebSched New Patient, WebSched Notify, Patient Portal Invites, Birthday Emails, and Statements.
- None: Patient will receive messages based on the setup rules for each service.
- Text: Do not send the patient automated messages via text.
- Email: Do not email the patient automated messages.
- Trophy Folder: Only visible when using the enhanced Trophy Bridge.
- Language: Select the patient's preferred language. Customize patient language options in Miscellaneous Setup. When a language is set, if a language translation exists for Sheets, eConfirmations, or eReminders, the preferred language will be used.
- Clinic: If using Clinics, set the patient's default clinic for patient payments, claim payments, and adjustments. If unassigned, the default will be none. To force users to assign a clinic, disable the preference Allow new patients to be added with an unassigned clinic.
- Referred From: Click [...] to select a referral source. Double-click the field to open the Referrals for Patient window. New referrals can be added in the Referral List.
- Specialty: Select a specialty. Customize options in Definitions: Clinic Specialties. Useful to differentiate Patient Clones.
Address and Phone

- Same for entire family: If checked, when information in this area is changed for one family member, it is updated for all family members.
- Same for entire super family: Only visible when the patient is the head of a Super Family and the Allow syncing patient information to all super family members preference is enabled. When checked, address and phone information for the super head are applied to all super family members (not just guarantors).
- Home Phone: Enter the patient's home phone.
- Address / City / State / Zip: Enter the patient's mailing address.
- Edit Zip: Associate cities and states with zip codes and add to them to the master list. See Zip Code List.
- Map: Open the patient's address in Google Maps. Only shows if Show Google Maps in Patient Edit window option is enabled in Preferences.
Address and Phone Notes

- Same for entire family: If checked, when information in this area is changed for one family member, it is updated for all family members. We recommend checking notes for other family members before applying to entire family as to not accidentally overwrite another note.
- Address and Phone Notes: Make notes about when to call a patient, which number the patient prefers, extra phone numbers, extensions, bad phone numbers, bad addresses, alternate addresses, etc. Text will show in bold red in the Patient Information area of the Family module. These notes also show in the Unscheduled List, Recall List, and appointment. Right-Click the text box for additional options.
Billing and Provider(s)
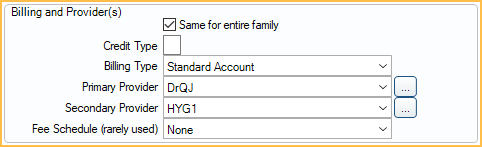
- Same for entire family: If checked, when information in this area is changed for one family member, it is updated for all family members.
- Credit Type: A one letter code that the office can use to track credit worthiness of patients based on credit reports, history of payment, or another preferred criteria. These letters are informational only. One method is using A, B, or C. If credit is unknown, users can use a 0. The code displays in appointments when CreditType is added to an appointment view, and in other places throughout the program. Corresponds with the ABC0 Display Field.
- Included in Super Family Billing: Only visible when the patient is a guarantor of a family included in a Super Family. If checked, this patient will show as the patient on super statements (statements that include the account activity for all super family members).
- Billing Type: The patient's billing type. Customize options in Definitions: Billing Types. The default Billing Type is set in Practice Setup. To change, user must have the Patient Billing Type Edit security permission.
- If the preference Adding new primary insurance plan to patient sets billing type is enabled, when a new primary insurance plan is created for the patient, and a billing type is set for the plan, the patient's billing type will automatically change to match. (If a user changes an existing plan's billing type, it will not automatically change the patient's billing type).
- Primary Provider: Select the provider who will usually see the patient. The default is the provider set as the practice default. If using clinics and providers are restricted to clinics, only providers available for the patient's assigned clinic are options. To change, user must have the Patient Primary Provider Edit security permission.
- Secondary Provider: The patient's secondary provider, often the hygienist. If using clinics and providers are restricted to clinics, only providers available for the patient's assigned clinic are options.
- Fee Schedule (rarely used): Only set this when the patient has a fee schedule different than the UCR fees. Typically this selection will be none and the fee schedule will be determined by the provider's default fee schedule, or the insurance plan fee schedule. See Fee Schedule Logic. If the patient needs a discount fee schedule, use Discount Plans instead.
Tabs
The following tabs may be available depending on what options are turned on in Show Features.
- Edit Patient Information: Public Health Tab (race, ethnicity, grade level, school, responsible party)
- Edit Patient Information: Hospitals Tab (ward, admit date)
- Edit Patient Information: Other Tab (SSN, date of first visit, student status)
- Edit Patient Information: Emergency Contact Tab
- Edit Patient Information: EHR Misc Tab (mother's maiden name, date deceased)
Saving Changes
OK: Click to exit the window and save changes.
- If the status of any Same for entire family or Same for entire super family checkboxes was switched from checked to unchecked, information in the pertaining area (e.g., Address and Phone, Billing and Provider(s), etc.) must also be changed for the checkbox status to be updated.
- If the status of any Same for entire family or Same for entire super family checkboxes was switched from unchecked to checked, information in the pertaining area (e.g., Address and Phone, Billing and Provider(s), etc.) for all family members or super family members is updated to match the patient.
- If a zip code is entered without a city or state, the Add Zip Code window displays.
Cancel: Close the window without saving any changes
Offices can prompt staff to complete certain fields using Required Fields marked with an asterisk (*). If required fields are incomplete when staff clicks OK on the Edit Patient Information window, a message will notify them that required fields are missing or incorrect.
- Click Cancel to return to Edit Patient Information and view the incomplete fields, marked by a red exclamation point, then enter the required information.
- Click OK to save changes without entering required fields.