

Digora Soredex Optime Bridge
In the Main Menu, click Setup, Program Links. Double-click on Digora from www.soredex.com.
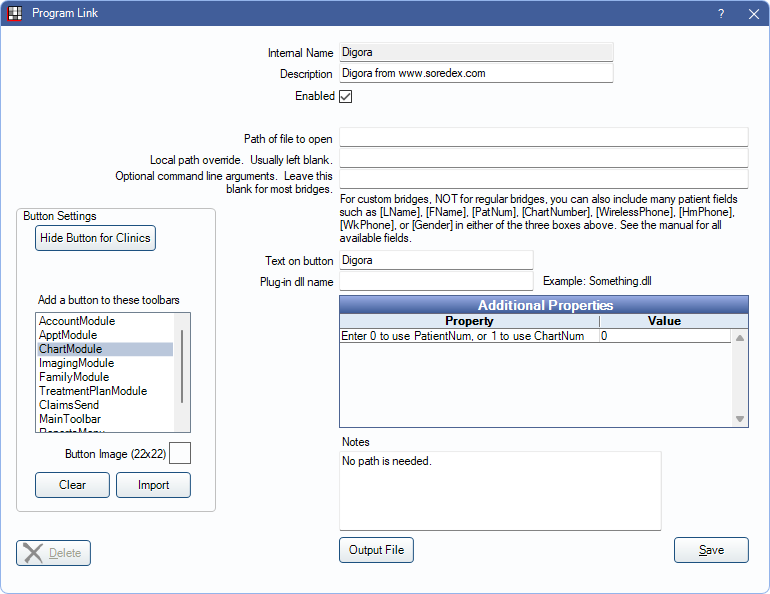
Soredex is an imaging system also known as Digora. The Digora bridge works for versions up to 2.1. Website: https://dexis.com/en-us/digora-optime.
To enable the bridge:
- Check the Enabled box.
- Verify the Path of file to open.
- Double-click on Additional Properties to change settings. Use the PatNum (enter 0) or ChartNum (enter 1) as the patient ID.
- Set up a clickable bridge button.
- Under Add a button to these toolbars, highlight where to display the button.
- Enter the Text on button.
- (Optional) Import an image to show on the button (22 x 22 pixels).
- If using clinics, click Hide Button for Clinics. Select which clinics the button should display on.
- Click Save.
Technical Details
- The Digora bridge uses the Windows clipboard to pass commands to Digora. We used the specifications for Digora 2.1 dated 6/26/2002, although it almost certainly works with later versions as well.
- Digora must be running when the bridge button is clicked in Open Dental. If not, you may see an error or no action will occur.
- Digora will not automatically be brought to the focus when the bridge button is clicked in Open Dental.
Clicking the bridge button in Open Dental will put a string similar to this on the clipboard:
$$DFWIN$$ OPEN -n"Smith, John" -c"1234" -r -a
This should trigger Digora to open the patient card for the specified name and code pair. In the example above, the name is Smith, John and the patient code is 1234. If the patient doesn't exist in Digora, the -r flag that you see above tells Digora to create that new patient. The -a flag tells Digora to change focus to itself.
Troubleshooting: Close Digora, click the Digora button in Open Dental, then open a text editing program and paste so you can see the command Digora adds to the clipboard.
Potential pitfalls: We don't know how Digora monitors the clipboard so that it knows when a command is present. There might be a setting in Digora that needs to be turned on in order to enable the clipboard monitoring. This is not addressed in the bridge specifications we were provided.