

Appointment Views
Quickly change the information and Operatories displayed in the Appointments Module by switching the Appointment View.
In the Appointments Module, on the right, is the Appointment View dropdown.
Appointment Views determine which Operatories, providers, and appointment information displays in the Appointments Module. They also determine the default start time when Open Dental is launched. Multiple views can be set up with any combination of Operatories, providers, and patient or appointment information.
Also see:
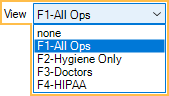
Select the Appointment View using the View dropdown on the right side of the Appointments Module or press an associated function key (F1, F2, etc.) on the keyboard.
The appointment schedule immediately changes to reflect the Appointment View settings.
Examples of Appointment Views:
- HIPAA-compliant view (no PHI)
- A view for each provider
- A view for each Operatory
- Hygiene appointments
When using Clinics, changing the Clinic in the Main Menu changes the Appointment View.
The default Appointment View when a user logs on follows logic in this order:
- The same view active the last time the user logged out.
- The view last active on the workstation.
- The first available view that is not none.
- If no other views, the none view.
The None view cannot be edited. When the view is set to none, the view shows all providers, all operatories, patient first and last name, and procedures attached to the appointment. If Clinics are enabled, and a user selects none on Headquarters, they are prompted to select a view.