

DentalXChange Attachment
Attachments can be sent electronically through the DentalXChange (ClaimConnect) clearinghouse.
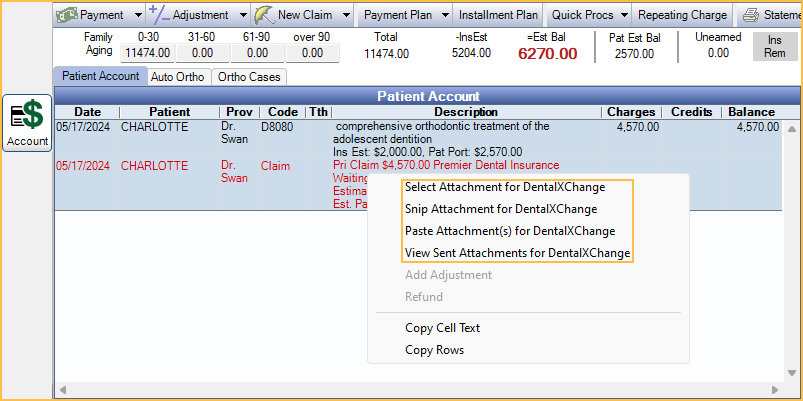
In the Account Module, right-click a claim, and select a DentalXChange attachment option.
Alternatively, in the Treatment Plan Module, right-click a Preauthorization.
Additional Information:
- Options are only available when DentalXChange ClaimConnect is set as the default dental clearinghouse and Allow sending attachments is enabled for the clearinghouse.
- For a new Claim, clicking Send or Save in the Edit Claim window validates the claim. If an attachment is required by DentalXChange ClaimConnect and/or the insurance carrier, there is a prompt to add an attachment.
- If sending a narrative, text entered in the Narrative box can only be sent with another attachment (i.e., image). To send a narrative only, attach it as an image (i.e., screenshot) instead.
- If Save Attachments to Imaging Module is enabled in DentalXChange ClaimConnect E-Claims clearinghouse setup, a copy of the image is saved to the Imaging Module when using Snip Attachment for DentalXChange or Paste Attachment(s) for DentalXChange.
- Attachments must be attached and sent prior to sending the claim or preauthorization. The attachment ID is what links the attachment to the claim to allow the two to be sent together.
The window that opens is dependent on the option selected from the right-click menu. Claims needing attachments must have the attachment created prior to sending the claim.
Select Attachment
Choose Select Attachment for DentalXChange to open Select Image to add attachments from the Imaging Module.
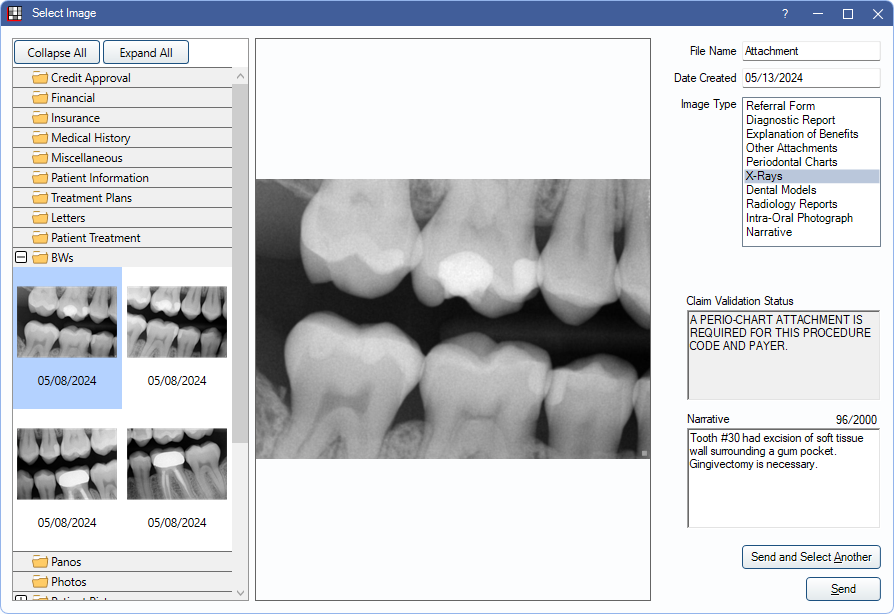
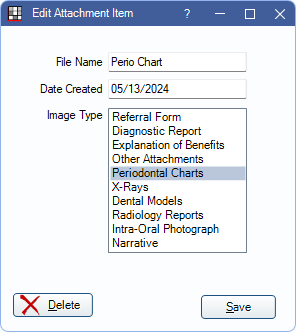
Highlight an image from an Image Category to attach. Only image files (e.g., PNG, JPEG, TIFF, etc.) can be attached. If an invalid file type is selected, there is a warning. Enter attachment details:
- File Name: Defaults to the description for the file in Image Info. If there is no description, the File Name defaults to Attachment. Edit as needed.
- Image Type: Highlight a type to indicate what the attachment is.
- Date Created: Date of the attached image. Defaults to the current date.
Narrative: Enter a claim narrative as needed. Allows up to 2,000 characters. If there is an existing narrative entered, it can be edited here.
Claim Validation Status: Lists any errors or validation notes received from DentalXChange for the claim or attachments.
Click Send and Select Another to send the attachment to DentalXChange and keep Select Image open to choose an additional attachment.
Click Send to send the attachment to DentalXChange and close Select Image.
Snip Attachment
Choose Snip Attachment for DentalXChange to launch the Snipping Tool and Image Info to create a screenshot to attach.
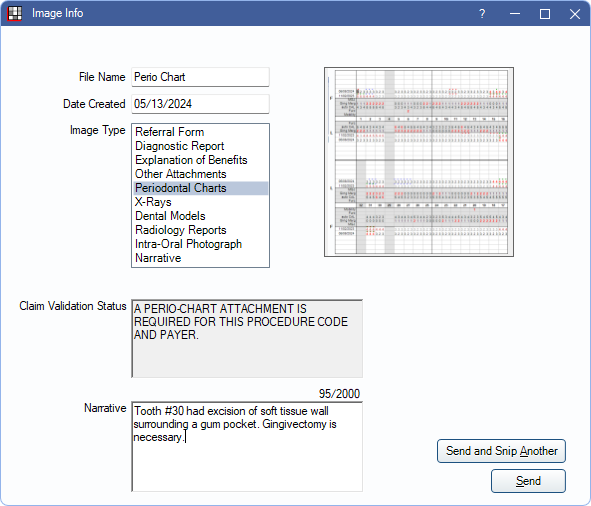
After the screenshot is taken, a preview of the screenshot is displayed in the Image Info window. Enter attachment details:
- File Name: Enter a description for the attachment. If Save Attachments to Imaging Module is enabled in DentalXChange ClaimConnect clearinghouse setup, this is added as the Description in Image Info.
- Date Created: Date of the attached image. Defaults to the current date.
- Image Type: Highlight a type to indicate what the attachment is.
Narrative: Enter a claim narrative as needed. Allows up to 2,000 characters. If there is an existing narrative entered, it can be edited here. Clipboard contents (e.g., copied text) are cleared when opening the Image Info window.
Click Send and Snip Another to send the attachment to DentalXChange and relaunch the Snipping Tool and Image Info windows to create an additional attachment.
Click Send to send the attachment to DentalXChange and close Image Info.
Paste Attachment
Choose Paste Attachment(s) for DentalXChange to paste an item from the Clipboard and open Paste Attachment.
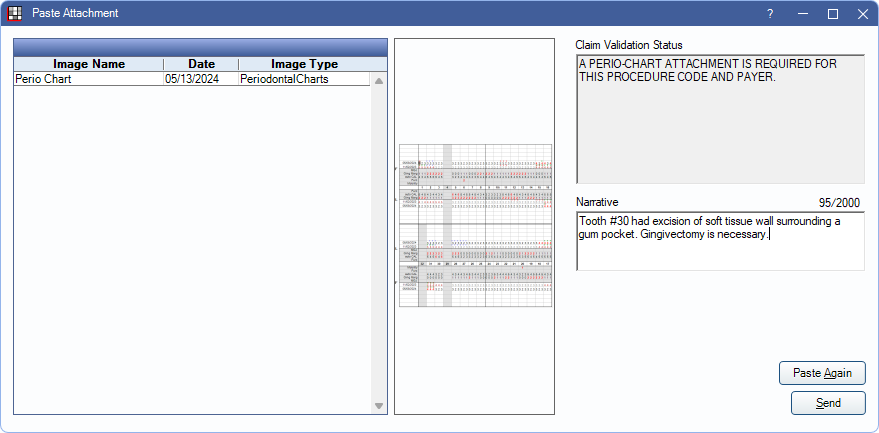
The grid lists all attachments pasted since the window opened.
- Double-click an image name to edit details.
- File Name: Enter a description for the attachment. If Save Attachments to Imaging Module is enabled in DentalXChange ClaimConnect clearinghouse setup, this is added as the Description in Image Info.
- Date Created: Date of the attached image. Defaults to the current date.
- Image Type: Highlight a type to indicate what the attachment is.
- Click Delete to remove the file from the attachment.
- Click Save to keep changes.
- Right-click an image name to select or change the Image Type.
The currently selected image is shown in the preview area.
Claim Validation Status: Lists any errors or validation notes received from DentalXChange for the claim or attachments.
Narrative: Enter a claim narrative as needed. Allows up to 2,000 characters. If there is an existing narrative entered, it can be edited here.
Copy another image and click Paste Again to add an additional image from the clipboard.
Click Send to close Paste Attachment and send the attachments to DentalXChange.
View Sent Attachments
Choose View Sent Attachments for DentalXChange to open Attachment History and view details of any attachments. 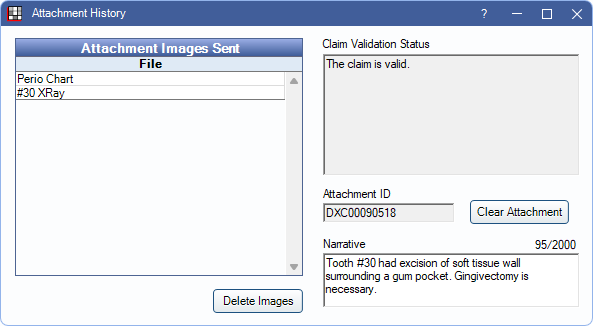
Attachment Images Sent: Lists the File Names of any attachments that have already been sent.
Claim Validation Status: Lists any errors or validation notes received from DentalXChange for the claim or attachments.
Attachment ID: Read-only. Displays the auto-generated number associated with the claim attachments.
Clear Attachment: Click to remove all images, clear the narrative, and clear the attachment ID. Any attachments that need to be sent must be reattached and a new Attachment ID is created.
Narrative: Enter a claim narrative as needed. Allows up to 2,000 characters. If there is an existing narrative entered, it can be edited here.
Delete Images: Highlight files from the Attachment Images Sent grid and click to remove files from the attachment.
Resending a Claim
If a claim must be resent due to a missing attachment, do the following:
If insurance provided a reference ID number:
- Add the missing attachment to the original claim.
- In the Misc Tab of the claim, add the Original Reference Number.
- Change the Correction Type to Replacement.
- Resend the claim using the Resend button
- Select The claim was accepted and I need to replace it with updated information when prompted.
If insurance did not provide a reference ID number.
- Add the attachment to the original claim.
- Resend the claim using the Resend button.
- Select The claim has not been accepted yet and I need to resend it when prompted.
Troubleshooting
When choosing Snip Attachment for DentalXChange, I get an error that neither Snip & Sketch nor the Snipping Tool could be launched.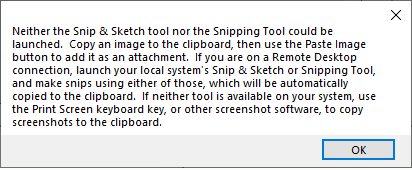
Windows Snip & Sketch or Snipping tool could not be launched from Open Dental. Use the Paste Attachment(s) for DentalXChange or Select Attachment for DentalXChange options instead.