

Draw
Use the Draw toolbar to edit images by drawing or adding text, lines, or measurements.
In the Imaging Module, click Draw.
![]() See our X-Ray and Measurements Mounts Webinar.
See our X-Ray and Measurements Mounts Webinar.
When Draw is selected, the above toolbar will display.
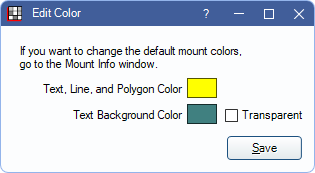
Color: Click to select the color applied to drawings and text.
- Text, Line, and Polygon Color: The default color for new text, lines, or polygons. Click the colored box to edit the Color.
- Text Background Color: The default color applied to the background of new text items. Click the colored box to change or check Transparent for text to have no background by default.
Text: Enable the text tool. Click on the image to add text. The Edit Text window is opened.
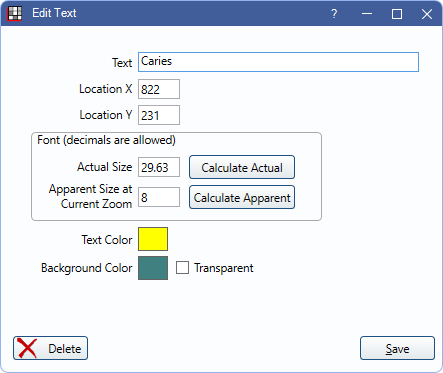
- Text: Enter the text to display on the image.
- Location X/Y: Displays the current X and Y position where the text is shown. These values can be edited manually or text can be moved once this window is closed by clicking and dragging text on the image.
- Actual Size: The actual size of the font when the image is at 100%. Click Calculate Apparent to view the size of the font as it appears when the image is zoomed in or out.
- Apparent Size: The size the font appears at the current zoom level. Click Calculate Actual to view the actual size of the font.
- Text Color: The current color of the text. Click the colored box to change.
- Background Color: The current color of the enclosing box (i.e., background) behind the text.
- Transparent: When checked, no background color is applied to the text.
Pen: Enable freehand drawing. Click on the image to draw.
Line: Enable line drawing. Click to draw a line on the image. When selected, additional options are displayed in the tool bar.
- Edit Points: Enable the ability to edit points on an existing line. Hover over a line until the + icon appears, then click and drag to move a single line point. Allows line to follow curves.
- Measure: Enable the tool to measure lines. Click on a line to measure it. The Edit Text window opens with the measurement entered in the text box. Click Save to add the measurement as text. Scale must already be set. See Calibrating Scale below.
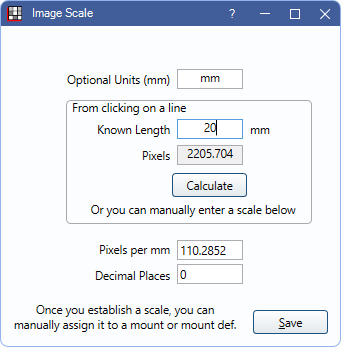
- Scale: Click open the Image Scale to view or set a scale. See Calibrating Scale below for additional details.
- Optional Units: Units that display on a measured line. Typically mm.
- Known Length: The known length of a line. This number is manually entered when calibrating the scale.
- Pixels: The number of pixels on a line. Automatically calculated when calibrating the scale.
- Pixels per: Label changes dependent on the Optional Units entered (e.g., mm). This number is populated after clicking Calculate. Determines how many pixels on the screen equals 1 unit of measurement (e.g., pixels per millimeter).
- Decimal Places: How many decimals a line should measure to.
Polygon: Enable freeform shape drawing. Click the image to draw a filled shape.
Eraser: Enable the eraser tool. Click a drawing, line, or text to remove from the image.
Change Color: Apply the current color defaults to an object. Once the tool is selected, click a line, text, polygon, or pen drawing to change the color.
Close: Hide the Draw toolbar.
Calibrating Scale
Calibrating a scale only needs to be done once as all imaging is taken with the same machine. Once calibrated, lines can be measured using the Measure tool.
- Take an image with a known length. This can be done on a test patient.
- Draw a line along the known length on the image.
- Click Set Scale, then cancel out of the window.
- Click on the line of the known length. The Image Scale window will open again with the Pixels pre-populated.
- Enter the known length in the Image Scale window, then click Calculate.
- The Pixels per mm field will populate. Take note of this number.
- Enter the Pixels per mm number in two places:
- Set a Default Measurement Scale in Preferences.
- Set the Measurement Scale on each mount template (see Mount Definitions).
When measuring a line on an image in a mount, the calculation is done automatically.
To measure a line on a single image, not within a mount, enter the scale manually.