eClipboard Branding Profile
Add the clinic name and logo to eClipboard devices.
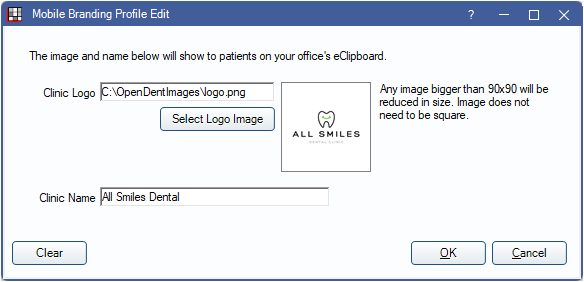
In eClipboard Setup, click Branding Profile.
If using clinics, information in this window is specific to the clinic selected in eClipboard Setup.
Clinic Logo: The location of the clinic logo. Click Select Logo Image to browse for the image.
- A display of the logo displays on the right. Logos larger than 90x90 are reduced. Images do not need to be square.
- PNG is the preferred image format. The other accepted formats are JPG, BMP, and GIF.
- Transparent images are supported, but images always display on a white background.
- The recommended image location is the OpenDentImages folder. Other locations are acceptable but must be accessible by the eConnector.
Clinic Name: Enter the clinic name, as it should be displayed for patients.
Click Clear to clear information entered in this window.
Click OK to save changes. Must log out of eClipboard and log back in on each device for the setting to take affect.
Clinics
If using clinics, each clinic can have a unique logo and name associated.
- If Use Defaults for this clinic is checked in the eServices eClipboard window, the default Branding Profile is used and the Branding Profile is disabled for the selected clinic.
- If Use Defaults for this clinic is unchecked in the eServices eClipboard window, enter the clinic-specific logo and name.
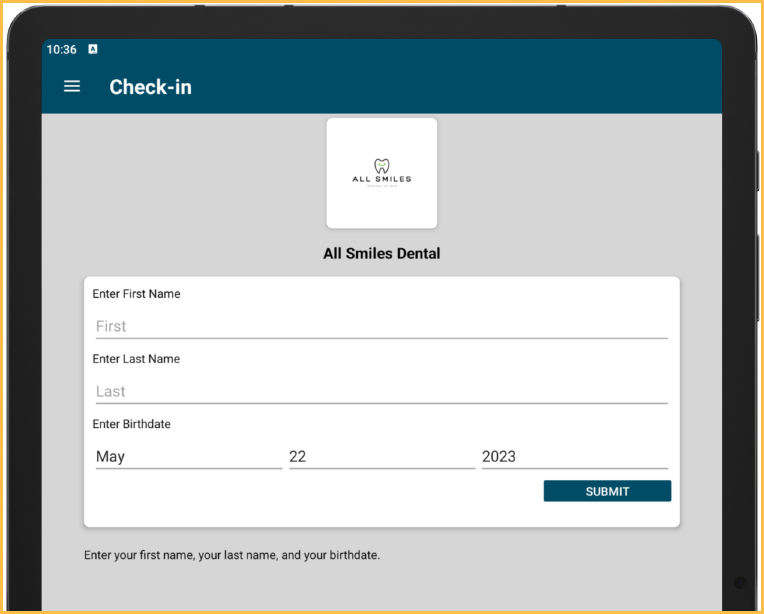
What the Patient Sees
When branding is set up, the patient sees the information at the top.