

Dexis Bridge
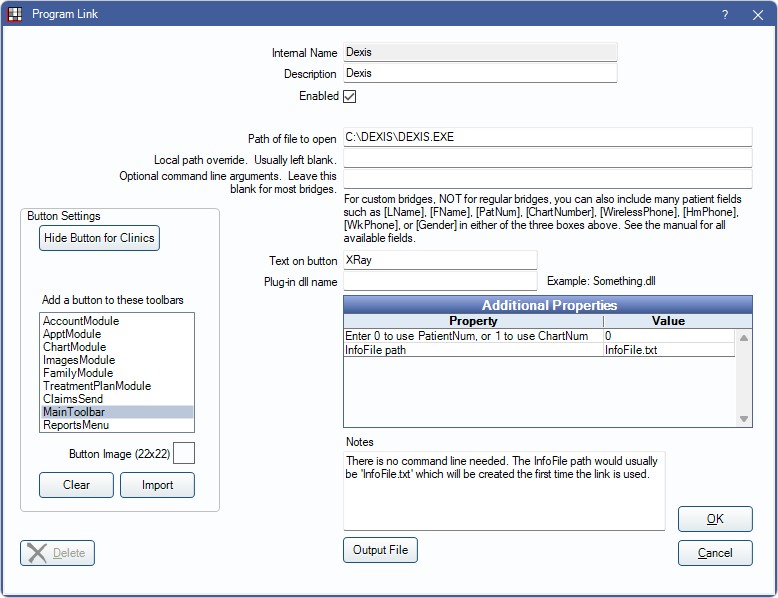
In the Main Menu, click Setup, Program Links. Double-click on Dexis.
Dexis is imaging software. Website: http://www.dexis.com.
To enable the bridge:
- Check the Enabled box.
- Verify the Path of file to open.
- Double-click on Additional Properties to change settings.
- Use the PatNum (enter 0) or ChartNum (enter 1) as the patient ID.
- Verify that the InfoFile path is a full file path.
- Set up a clickable bridge button:
- Under Add a button to these toolbars, highlight where to display the button.
- Enter the Text on button.
- (Optional) Import an image to show on the button (22 x 22 pixels).
- If using clinics, click Hide Button for Clinics. Select which clinics the button should display on.
- Click Save.
Technical Data
The bridge sends patient data from Open Dental to the specified text file. Example file:
Williams, Andrea 10/30/91 (135)
PN=135
LN=Williams
FN=Andrea
BD=10/30/91
SX=F
Open Dental then launches Dexis, passing the file name as a command line argument. Example:
C:\DEXIS\DEXIS.EXE @InfoFile.txtThe patient number is the only required field in the text file. This means that Dexis likely organizes everything by patient number, and that patient numbers must be identical with those in Open Dental. This is not a problem for new setups with no patients entered in Dexis yet. But it may present a problem if there are already a number of patients entered in Dexis before beginning to use Open Dental. The solution is to change the patient IDs in Dexis to match those in Open Dental.
Conversions
Sometimes the Dexis patient IDs will not match the Open Dental patient IDs after a data conversion. The Open Dental Conversions Department can determine if a Dexis patient ID renumbering will be required after the data conversion is complete.
Dexis has the ability to renumber patient IDs, but it is our understanding that they now charge a fee for that service. Open Dental can also sometimes renumber the Dexis patient IDs for a fee (see Image Conversions for pricing).
Offices must be using Dexis version 10+ (the SQL Server database versions) in order for Open Dental to look into whether or not a patient ID renumbering is possible by the Open Dental Conversions Department. There must be must be an identifiable link between the patient records in Dexis and Open Dental in order for Open Dental to complete the renumbering.
Troubleshooting
Error: Could not access C:\DEXIS\DEXIS.EXE
Possible Solutions:
- Usually this means that Dexis is not installed in the location specified for Path of file to open.
- If it is properly installed in the location and can run outside of Open Dental, usually the issue is that the current user has permission issues on the directory containing the file infofile.txt. The default location for this file is C:\Program Files\Open Dental. This can be resolved by setting the InfoFile path to blank.
- Open Dental may need to be to set to run as administrator for the Dexis bridge to work if the path to the Dexis.exe file is already correct. Alternatively, try moving the data file (InfoFile.txt) to a directory that does not require administrator level permissions (something like C:\ProgramData\Dexis\InfoFile.txt).
When using Open Dental Cloud, the Dexis bridge does not launch and there is no error message
Verify the InfoFile Path in additional properties. For Cloud users, this is normally C:\Temp\InfoFile.txt, and it cannot be blank.