

Patient Forms
Patient Forms are types of Sheets that patients can complete electronically, such as registration forms, HIPAA forms, financial agreements, and medical histories.
In the Main Toolbar, click Forms.
Patients can complete the forms in one of the following ways:
- Directly in the form (e.g., on the operatory computer, on a tablet, etc.)
- Via the Kiosk Manager
- Via Web Forms
- On paper, then scanned into the Imaging Module
- Via eClipboard
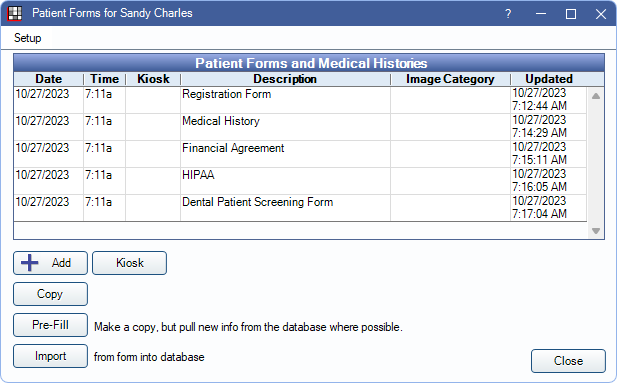
Any Patient Forms or Medical Histories already generated for the patient show in this window. Images, PDFs, or other files that are in an Images category marked with a usage of Show in Patient Forms also show.
Double-click on a row to view the document or fill it out in the Fill Sheet window. From there, it can be printed, emailed, filled out, or sent to the kiosk.
Setup: Click Setup in the upper left corner, then select a menu option.
- Sheets: Go to Sheets to customize Patient Forms, Medical Histories, or Consent Forms.
- Image Categories: Opens the Image Categories Definitions window.
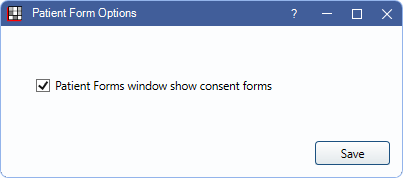
- Options: Check the box to show Consent Forms in the list.
Sort forms by: Select the order in which to sort forms.
Add: Create a new form for this patient. Pick Sheet opens.
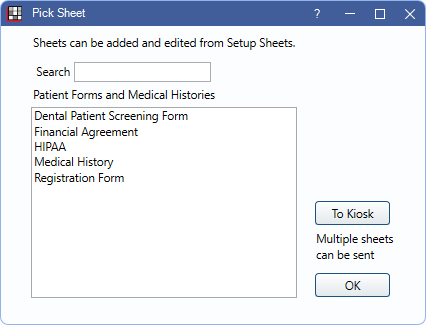
- Search: Type a sheet name to filter the list. Results update automatically.
- Sheets with a type of PatientForm or MedicalHistory are listed. Consent forms are also listed if the option is enabled. Sheets listed in this window depend on the following:
- If a sheet type (i.e., PatientForm, MedicalHistory, or Consent) has a custom sheet, only the custom sheets are listed. If no custom sheets exist for the sheet type, the Internal sheets for that type are listed.
- To show the internal sheets, if custom sheets have been created, create a copy of the Internal sheet in Sheet Defs.
- To Kiosk: Highlight one or more forms, then click To Kiosk to put the form in the Kiosk queue.
- All forms waiting to go to the kiosk have a number indicating their order in the Kiosk column.
- To change the order, double-click the form to open the Fill Sheet window, then change the value in the Show Order in Kiosk field. To remove the form from the Kiosk, clear the number from the field.
- If the form has a required signature field, the kiosk order cannot be removed or altered. The form must be deleted and sheets re-added in the proper order.
- Double-click a sheet or highlight and click OK to open the Fill Sheet.
Kiosk: Launch the Kiosk on this computer to allow patient to fill out forms. Alternatively, users can control a dedicated Kiosk from the Kiosk Manager.
Copy: Create a new copy of an existing form (useful when updating information).
Pre-Fill: Create a new form using information from the database and the selected patient form. See Pre-Fill Logic section below.
Import: Import completed form data into the database. See Import Patient Forms and Medical Histories.
Medical History Update
To have a patient review a previous medical history and make changes, highlight the most recent medical history and click Pre-Fill to open it. The pre-filled copy does not have a signature and does have today's date. Print it, send it to the Kiosk, or eClipboard, so the patient can make any changes and sign it. Changes are saved to the new form; they do not overwrite the original. Then import the new form, or enter the changed data.
Pre-Fill Logic
- Only works with Custom Sheet Defs (see Sheets). If an Internal Sheet Def is selected for Pre-Fill, users are prompted to select a Sheet Def type when attempting to import.
- When using Pre-Fill on forms filled out in version 22.2 or newer, fields are filled from the database if available (e.g., patient information fields). Miscellaneous fields (i.e., misc sheet field type) are copied from the previously filled out form.
- When using Pre-Fill with forms filled out prior to version 22.2, only database fields are pre-filled. Miscellaneous fields (i.e., misc sheet field type) are left blank.
- When using Pre-Fill with forms filled out in version 23.1 and newer misc checkboxes and combo boxes are prefilled with data from a previously filled out form, if available.
- When using Pre-Fill with forms filled out prior to version 23.1, misc checkboxes and combo boxes are left blank.
- Retrieved Web Forms can only be used to pre-fill data if the Web Form was created or updated after version 22.2 or greater. See Web Form Setup for instructions.
- Insurance information only pre-fills from the database and cannot be copied from previous form.
- If there are medications entered into the database, these values are used to pre-fill the form. If no medications are entered into the database, data from the previous form is copied.
- Problems and allergies in the database are pre-filled. Problems and allergies not in the database are not pre-filled. Inactive problems and allergies are pre-filled as No.
- Any change to the sheet (other than editing an existing Static Text field) requires the form to be filled out again before it can be used for Pre-Fill.