

DoseSpot eRx / Prescription
Use DoseSpot eRx to send electronic prescriptions for patients.
In the Chart Module, click eRx.
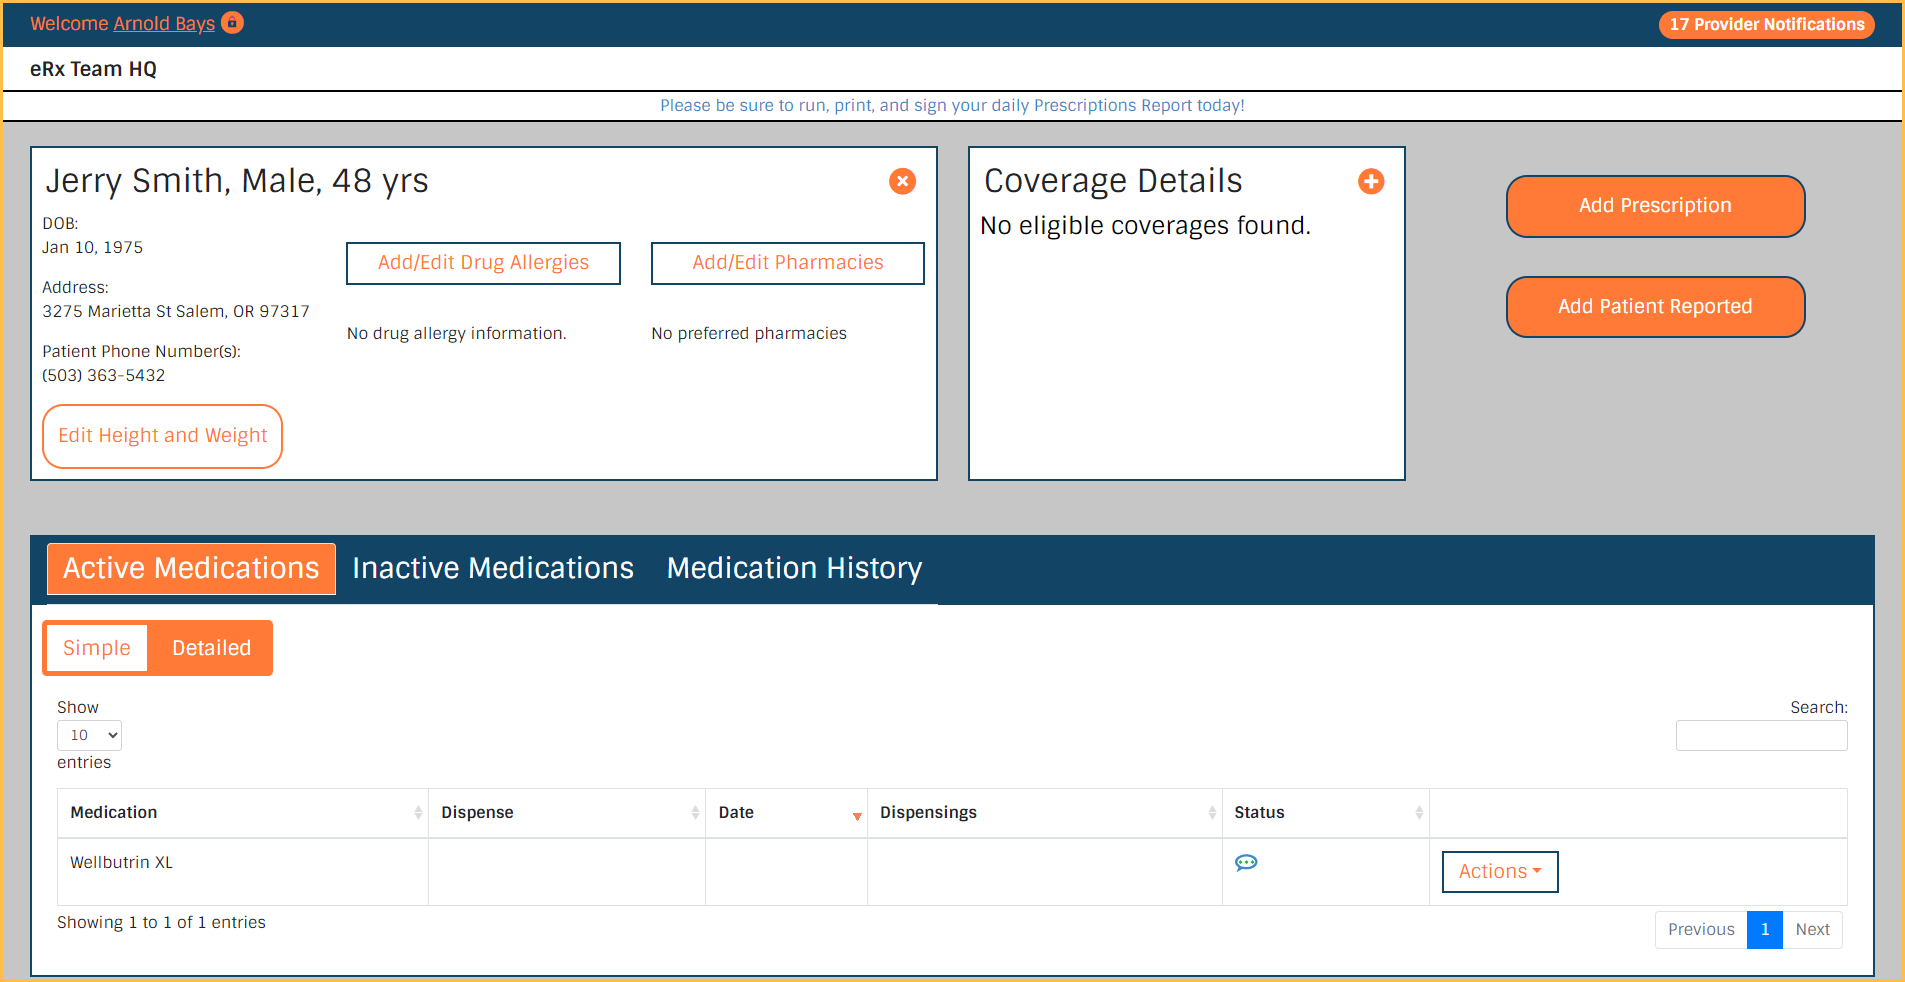
Alternatively, DoseSpot can be launched from the ODMobile and ODTouch apps. Providers and proxy (non provider) clinicians can begin using DoseSpot after DoseSpot Setup is complete.
Proxy Users
If logged into Open Dental as a non-provider (proxy) user, there is a prompt to choose the prescribing provider before the DoseSpot interface opens.
Providers who are scheduled for today, or are the patient's default provider, are shown by default. Check Show All to see additional providers.
Proxy users can only create pending prescriptions. A registered provider must complete the sending process.
Before Creating a New Prescription
Before creating a new prescription for a patient, there are some initial steps that may need to be taken:
- The DoseSpot interface is launched using the information for the currently selected patient. Choose the applicable patient before launching DoseSpot. Close DoseSpot and re-open to switch patients.
- Patient information updated within Open Dental also updates the patient in DoseSpot.
- If prescribing for a patient under the age of 18, first enter their height and weight in Vital Signs.
- Enter relevant (e.g., drug-related) patient Allergies into DoseSpot.
- Enter the patient's Current Medications into DoseSpot.
- Set the Patient's Preferred Pharmacy.
Prescribe and Send New Medications
Prescriptions can be created by a provider or proxy user, but only registered providers can send the prescription to the pharmacy.
Creating a New Prescription
For compound medications, see Creating a Custom Compound on this page instead.
These steps can be completed by a proxy user or registered provider.
- On the Patient Landing Page, click Add a Prescription.
- If a prescription was previously started, but not saved as pending, sent, or printed, click Continue Prescription instead.
- In the Add Prescription screen, choose the medication. The are several options:
- Search: In the Search bar, type the medication name. Click the applicable medication in the search results dropdown. Proceed to the next step.
- Clinic Presets: Click the Clinic Presets tab and choose a medication. The medication is immediately added to the Items to Prescribe. Skip to Step 6.
- Favorites: Click the Favorites tab and choose a medication. The medication is immediately added to the Items to Prescribe. Skip to Step 6.
- Clinician's Favorites: Click the Clinician's Favorites tab and choose a medication. This option is only available for proxy users. The medication is immediately added to the Items to Prescribe. Skip to step 6.
- Order Sets: Click the Order Sets tab and choose a medication set. The medications are immediately added to the Items to Prescribe. Skip to Step 6.
- Custom Compound: Create a new custom compound medication to prescribe. See the Creating a Custom Compound section on this page for detailed steps.
- Click the applicable medication in the search results dropdown.
- In the Medication Builder, choose the Build Medication Using preference:
- SIG Builder: Use this option to create directions using preset options (dropdowns). See SIG Builder.
- Custom Format: Use this option to manually enter details. See Custom Format.
- Once details are entered, click Create Medication.
- If sending multiple prescriptions for the patient, repeat steps 2-5 as needed to create all necessary medications.
- In the Add Prescription screen, verify the Items to Prescribe.
- Click a prescription name to view or edit the details.
- Click Prescription Benefits to view Real Time Prescription Benefits.
- Click Next.
- In the Review screen, check the prescriptions to send.
- If the prescription requires a Prior Authorization, this is noted in the Status column. See the Prior Authorizations section on this page for the next steps.
- Send the prescription(s) to the pharmacy.
- If a provider is logged in, click Approve & Send. If sending a controlled substance, proceed to Sending Controlled Substances steps. Non-controlled substances are immediately sent to the pharmacy.
- If a proxy user is logged in, click Save as Pending Prescription, and then proceed to the steps for Sending Prescriptions Created by Proxy Users.
- Alternatively, if a provider is logged in, click Print Prescription to generate a paper prescription.
Creating a Custom Compound
These steps can be completed by a proxy user or registered provider.
- On the Patient Landing Page, click Add a Prescription.
- In the Add Prescription screen, in the top right, click Custom Compound.
- In the Create Custom Compound screen, enter the Compound Name.
- Search for the Compound Ingredient and choose the applicable ingredient.
- If the applicable ingredient or strength is not in the results, click Add as a Custom Ingredient and confirm the ingredient is not a controlled substance.
- Enter the Total Dispense and Total Dispense Form values.
- Click Add Compound Ingredient to add an additional ingredient.
- Repeat steps 4-6 as needed to add all ingredients.
- Fill in the remaining prescription details.
- Click Create Compound.
The new compound is added the Items to Prescribe. Skip to Step 6 in the Creating a New Prescription section to finish sending the prescription.
Sending Pending Prescriptions
Once a Pending Prescription is saved by a proxy user, a registered provider must review and send the prescription.
To send a pending prescription:
- In Open Dental, open the Chart Module.
- In the Chart Module, click the eRx dropdown and select Pending Prescriptions.
- In the DoseSpot Tasks screen, any pending prescriptions assigned to the logged-on provider are listed.
- Review prescriptions and check the ones to be sent.
- Click Approve & Send.
Non-controlled substance prescriptions are immediately sent to the pharmacy. If sending any controlled substance, proceed to Sending Controlled Substances steps.
Sending Controlled Substances
Providers must be signed up for EPCS and have completed identity proofing to send prescriptions for controlled substances.
Once the provider clicks Approve & Send for prescriptions, they must complete Final Review & Sign Off.
- In the Final Review & Sign Off screen, review and confirm the pharmacy and prescription details.
- In the Final Actions for Sign Off area, check the Ready to Sign Prescription(s) box and enter the provider PIN.
- Click Confirm and Sign & Send.
- Complete DUO Two Factor (TFA). There are three options:
- Duo Mobile Push Notification: This method is used by default. In the DUO app, approve the push notification.
- Duo Mobile: If there are issues with the push notification, click Use a One-Time Passcode Instead. Open the DUO Mobile app and enter the 6-digit number shown.
- Duo Hardware Token: Click the power button on the token and enter the 6-digit number shown.
The prescription is sent to the pharmacy.
Sent Prescriptions
Once a prescription is sent, the status of the prescription can be viewed from the Patient Landing Page in the Patient Prescriptions list. Prescriptions are also synced to the Patient Medications list in Open Dental.
If DoseSpot Connect is enabled for a practice, and the sent medication has a coupon available, the patient is sent a text message with the coupon details after the prescription is accepted by the pharmacy.
Prescription Alerts
When creating prescriptions, users are warned if a prescription may have a drug or allergy interaction. These warnings can also be viewed on the Patient Landing Page, in the Patient Prescriptions area. Click the warning for details. 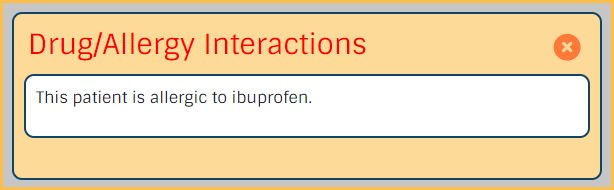
Allergies and Medications must be entered into DoseSpot to trigger an alert.
Creating Prior Authorizations
Depending on a patient's insurance, some prescriptions may require a prior authorization. Insurance information and prior authorization details are retrieved from a partner network in DoseSpot. Insurance information added in Open Dental is not considered.
To create a prior authorization when needed:
- When adding a new prescription, on the Review screen, check the prescription(s) requiring a prior authorization.
- At the bottom of the screen, click Initiate Prior Auth for Selected.
- On the Prior Authorization screen, verify the prescription details.
- Choose the Prior Authorization Initiation Request Type.
Once the Prior Authorization is initiated, it can be viewed from the Prior Authorizations tab in the Tasks area on the Patient Landing Page.
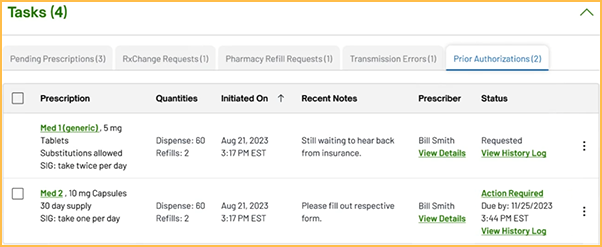
If a payer needs additional information, click Action Required to view details and take action. Once the prior authorization is approved, it is moved to the patient's Pending Prescriptions. See Sending Pending Prescriptions on this page for next steps.
Additional Resources
 See our video: Using Dosespot Webinar.